
Guide
Windrose Best Crit Build: Saber & Dragon's Breath (A Tier)
Windrose A Tier Build: Saber Dragon Crit Setup
If you want the highest raw auto-attack DPS in the game and love an aggressive "hybrid" playstyle, this is your build. The Saber Dragon Crit setup completely abandons heavy weapons and precision rifles. Instead, it weaponizes the Agility stat to create a hyper-fast, high-risk duelist. By combining the Privateer armor set with specific talents, we can mathematically push your Crit Chance past 50%. However, be warned: this is not a brainless button-mashing build. You have zero passive damage reduction. Every single buff in this build—including your only source of healing—is instantly wiped out if you take damage. If you cannot consistently hit your Perfect Blocks, this build will feel incredibly weak.
Tip: The Fencer sequence below fits the Windrose Talent Builder one-to-one—use it to compare against your current build without spending a respec.
Gear Overview: The Agility Arsenal
This build requires a massive shift in gear philosophy. We are abandoning Strength and Precision entirely. Both our melee and ranged weapons scale exclusively with Agility.
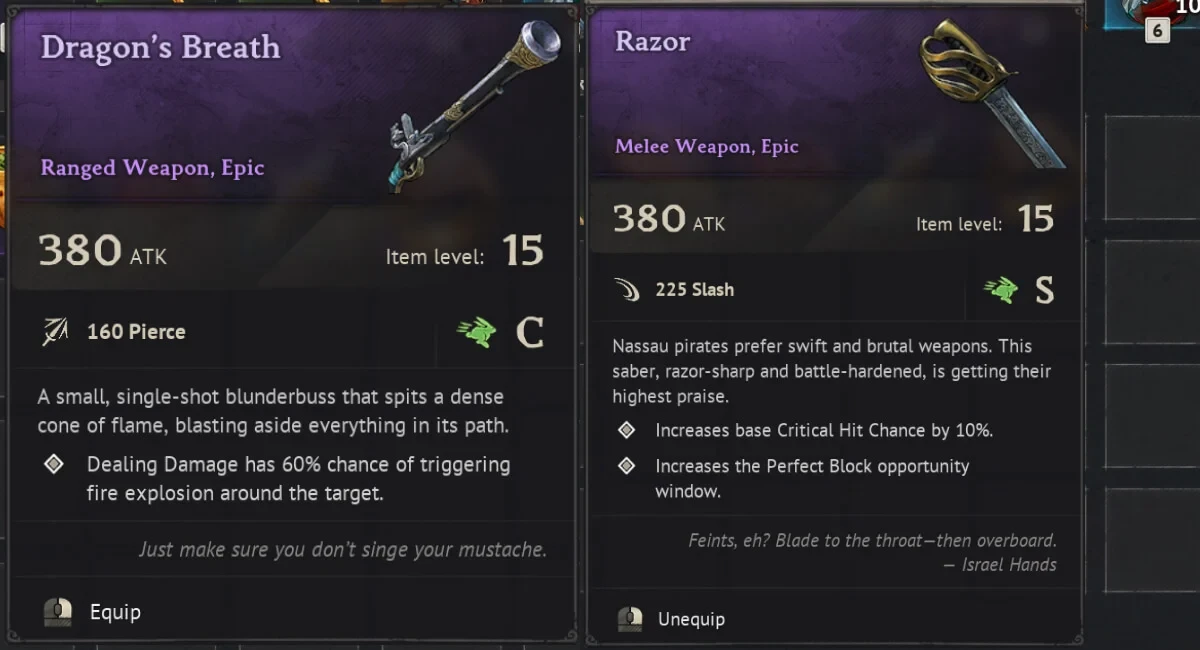
| Gear Slot | Best in Slot (BiS) / Alternatives | Why It's Mandatory |
| Melee Weapon | Dueling Saber (High Risk/Reward) OR Razor (Safer) | Fast 5-hit combos; innate +10% Crit Chance. |
| Ranged Weapon | Dragon's Breath > Reliable Blunderbuss | Scales with Agility; massive point-blank burst damage to trigger passive reloads. |
| Armor Set | Privateer (4x) | The 2-piece gives +10% Crit Chance. The 4-piece gives massive Crit Damage. Non-negotiable. |
| Ring | Major Cutthroat Ring | Grants +30% Critical Damage. |
| Necklace | Major Necklace Of Agility | Flat +15 Agility for pure scaling on both weapons. |
The Early Game Substitute: You can start this build relatively early in the Coastal Jungle just by obtaining the 2-piece Privateer set and a basic Razor saber. If you don't have Dragon's Breath (a late-game Cursed Swamp drop), the Reliable Blunderbuss works perfectly fine as a placeholder.
The Hard Math: Reaching 50.2% Crit Chance
We don't deal in generic terms like "high crit rate." Here is the exact mathematical breakdown of how you turn every second swing into a critical hit, alongside a staggering +90% Crit Damage modifier.
- Base Weapon (Dueling Saber/Razor): 10%
- Privateer Set (2-Piece Bonus): 10%
- Mastery Stat (Boosted to 20 via Food): 9.2%
- Surgical Cuts Talent: 9%
- Perfect Counter Talent: 12% (Requires a Perfect Block)
Total Effective Crit Chance: 50.2%
The Consumable Tax: Notice the Mastery stat? Do NOT hard-level Mastery. The Diminishing Returns (DR) curve heavily penalizes Mastery after 20 points. We leave our base Mastery at 0 and eat a Taco (+20 Mastery) to hit the sweet spot. Pair this with Gazpacho (+20 Agility) and the Elixir Of Concentration (+30% Critical Damage).
The Hybrid Playstyle: "If-Then" Execution
This build operates on a strict sequence. You are not a mindless hacker. You are a hybrid duelist.
- The Opener Rule: If you initiate combat, then you MUST start by sprinting into point-blank range and firing your Blunderbuss into their face. This instantly chunks their health and starts the "passive reload" timer in the background while you draw your Saber.
- The Perfect Block Requirement: If you block an attack, then it MUST be a Perfect Block. A Perfect Block triggers Perfect Counter (+12% Crit) and Retaliation (+24% Damage).
- The Glass Cannon Penalty: If you miss a block and take actual damage, then you instantly lose your Deadly Finale buff, your Retaliation buff, AND your Executioner's Grace heal-over-time. Your DPS will crash. You must dodge unblockable/ranged attacks at all costs.
- The Finisher: If your passive reload clicks (you will hear a sound cue), then weave the Blunderbuss shot into the end of your 5-hit Saber combo for a massive burst execution.
Stat Allocation & Talent Path
Because we have no inherent tankiness and lose our only heal when damaged, we cannot go 0 Vitality like the pure Ranged build.
- Agility: 15 (+20 from Gazpacho)
- Vitality: 20 (Necessary buffer for missed blocks).
- Endurance: 10 (The Saber has a long 5-hit combo; you need this stam to dodge afterward).
- Mastery: 0 (+20 from Taco)
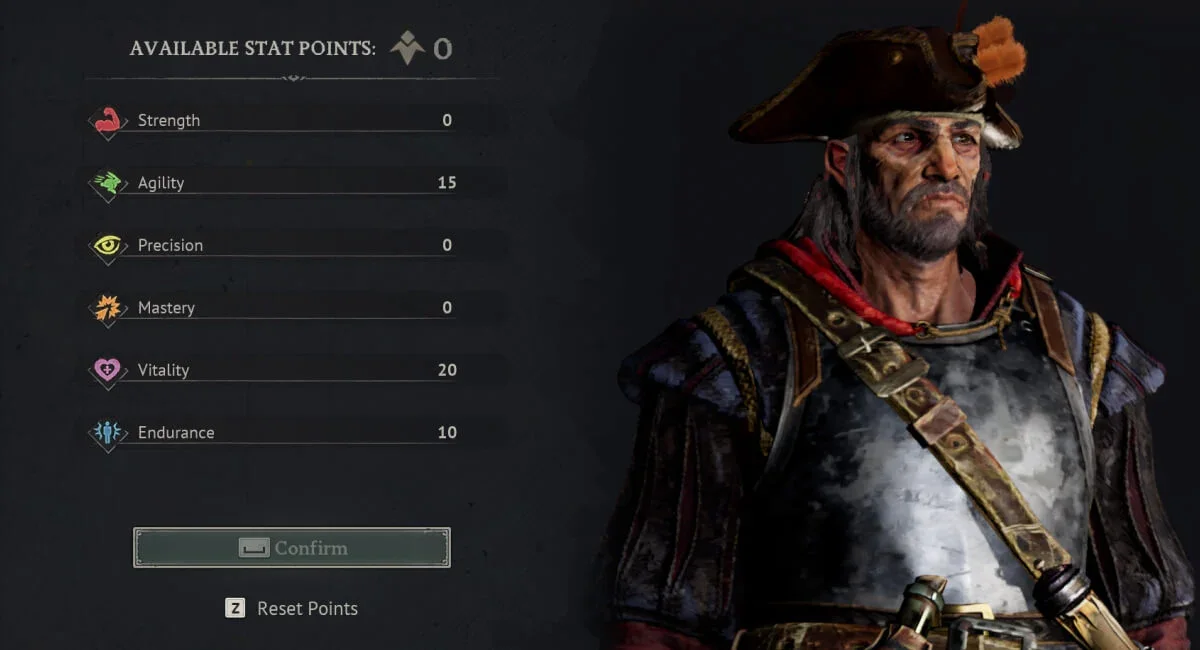
The Talent Sequence:
- Surgical Cuts (3/3) -> Mandatory raw crit increase.
- Perfect Counter (3/3) -> Mandatory +12% crit upon perfect blocking.
- Deadly Finale (3/3) -> Up to +25% ramping damage on consecutive hits.
- Quick Strikes (1/3)
- Deep Cuts (1/3)
- Executioner's Grace (1/3) -> Your ONLY source of self-sustain (Heals over 20s on kill, lost on taking damage).

FAQ: Saber Crit Build Troubleshooting
Q: I have all the gear, but my damage drops off randomly during fights. Why?
A: Read the fine print on your Talents. The core buffs of this build (Retaliation, Deadly Finale, Executioner's Grace) all share the same brutal penalty: "Lost on damage taken." If you are getting clipped by a stray pirate bullet or failing a Perfect Block, you are resetting your damage multipliers to zero.
Q: Why use the Blunderbuss instead of a normal Pistol?
A: Scaling and Combat Range. The Blunderbuss scales with Agility, perfectly matching your Saber. Pistols scale with Precision, which you have 0 points in. Furthermore, this is a melee-range build; the Blunderbuss acts as a devastating shotgun blast right before you start swinging, whereas a Pistol is meant for kiting.
Q: Is the Dueling Saber really better than the Razor? The Razor seems safer.
A: The Dueling Saber has a higher damage ceiling if you play perfectly, making it the BiS (Best in Slot) for veterans. However, the Razor is much more forgiving. If you are still learning enemy attack patterns and missing your Perfect Blocks frequently, stick with the Epic Razor. Only transition to the Dueling Saber when you are confident in your defensive timing.